Showing posts with label recipe. Show all posts

Sunday, September 16, 2012

Let the baking begin!

The hot summer weather broke last week
and we have had the most wonderful fall like temperatures!

Combine the gorgeous weather and over ripe bananas in my fruit bowl
and I thought banana bread!
I can bake again. :)
Then Jaime suggested chocolate chip banana bread.
Even better!


I consulted my dear friend Google and found THIS great recipe.

I made a few tweaks, 
adding in vanilla, cinnamon and less banana (I only had 2).
I also added in one chopped Hershey's bar instead of chocolate chips,
since it was the only chocolate I had on hand and didn't want to go to the store. 
Necessity is the mother of invention after all, right?

Sunday, May 20, 2012

Pineapple Sangria


Today I'm sharing my 
Pineapple Sangria Recipe
It is one of my favorites
and one I make for most of our parties.

Ingredients you will need:
1 Large Can of Pineapple Juice
I bottle of white wine (your choice)
1 each: Orange, Lemon, Lime.
Sprite Soda
1 shot of Triple Sec (optional)
2 tablespoons of sugar

Directions:
Pour half of the pineapple juice (approximately 8 ounces)
and 
he entire bottle of wine into a pitcher.


Add in 1 tablespoon of sugar.
Taste.
Add in the second if you like a sweeter sangria.


Friday, April 6, 2012

Bunny Snack Mix filled "Carrots"


Michael's Pre-School Easter/Spring Party was today 
and I wanted to bring a fun little treat for the kids.

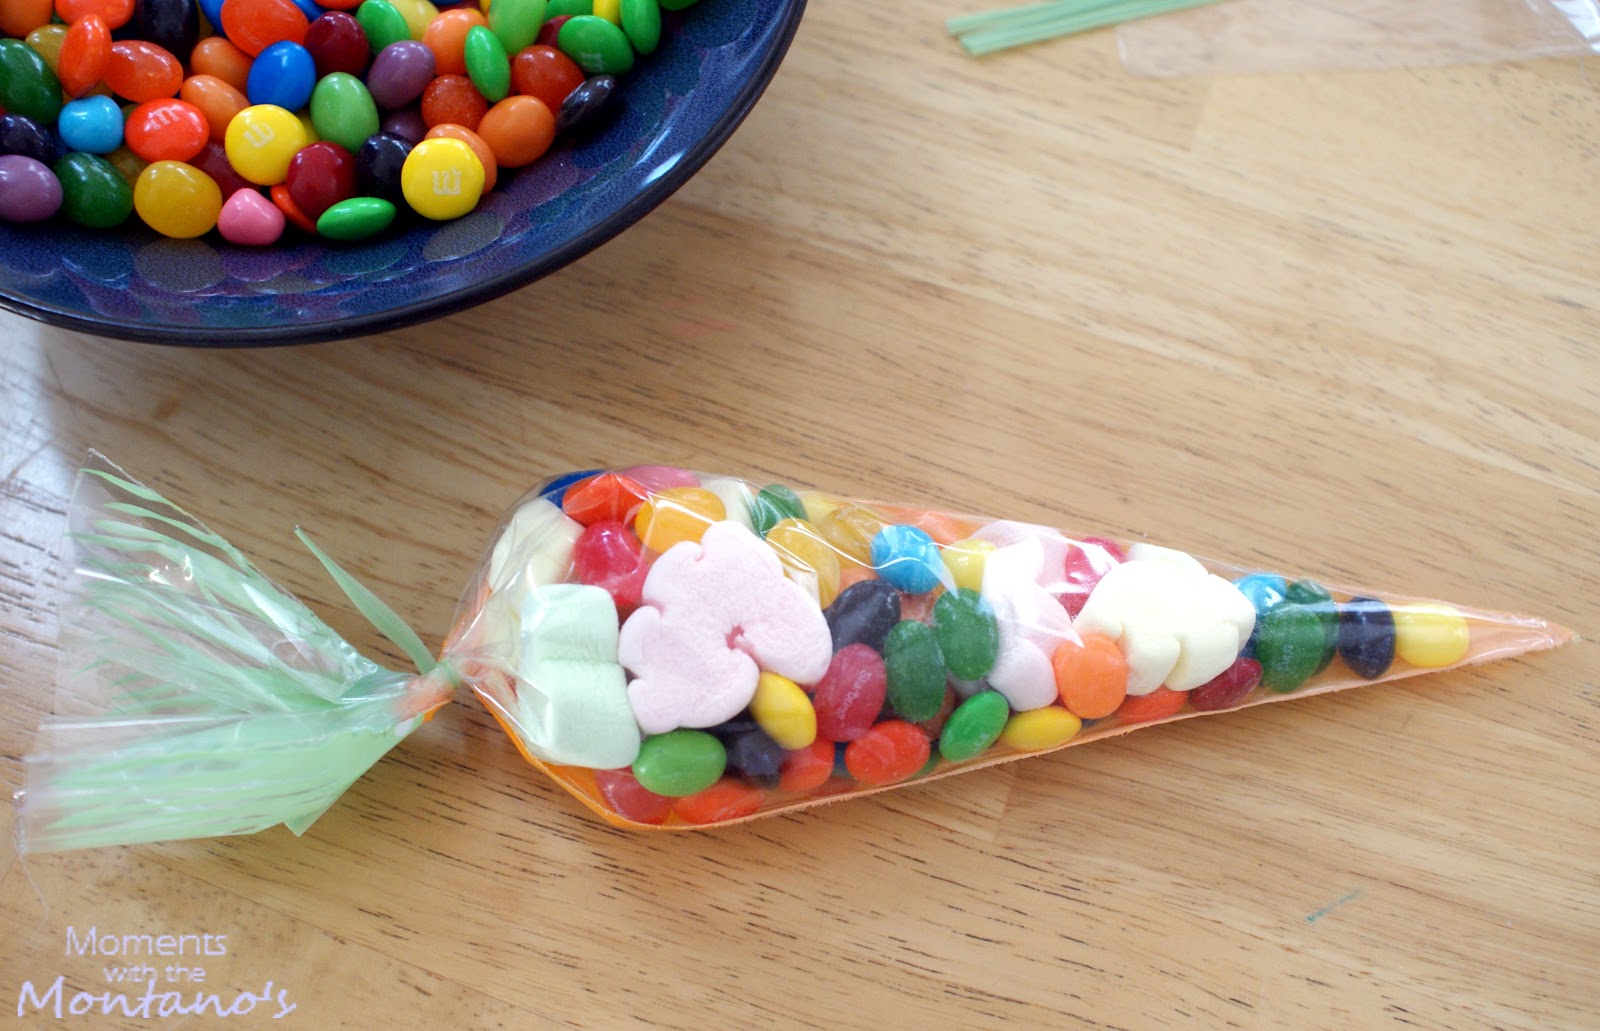
I found these fun little carrot bags at The Christmas Tree Shop.
15 bags and matching twist ties for $1.

Can beat that with a stick!


I decided to fill the bags with Bunny Snack Mix:

M&Ms
Starburst jelly beans (my fav)
Sweet Tart jelly beans
Bunny shaped marshmallows.


I mixed up all the candy in a bowl and got to stuffing.


Here is my first carrot all done.


My finished set of 24 for the kids.
I also grabbed Michael's basket since there was going to be an
Easter Egg Hunt before the party. 


I thought they were adorable and so easy.


I set one out for each child and they were a hit!


I wanted to add some pictures of Michael's Egg Hunt.
The kid was on fire.


Look at that stash of eggs.


Someone was very proud of themselves.  :)


XOXO,

Thursday, March 15, 2012

Chocolate Drizzled Heath Bar Cookies


Can you tell I have a sweet tooth? 
Can you say
YUM!

I first tried Heath Bar Cookies from a local Cookie Bakery.

They were AMAZING!
Chocolate, Toffee, Delightfulness!

I found a recipe and have been making small tweaks here and there.
Try making these, you will not be sorry.

Heath Bar Cookies

Yields: 3 Dozen Cookies

Ingredients:
  • 2½ cups all purpose flour
  • ½ teaspoon salt
  • 1 teaspoon baking powder
  • 1 cup unsalted butter, softened
  • ¾ cup granulated sugar
  • ¾ cup brown sugar
  • 2 eggs
  • 1 teaspoon vanilla
  • 1 package of Heath Milk Chocolate Toffee Bits


Baking Instructions:
  • Preheat oven to 350.
  • Sift together flour, salt, and baking soda.
  • Cream softened butter, sugar and brown sugar until fluffy. Beat in eggs and vanilla.
  • Add in flour mixture until well combined. 
  • Lastly, Stir or Fold in Heath bars bits.
  • Chill cookie dough for at least 30 minutes, up to overnight.  The longer you chill the better the results.
  • Drop heaping spoonfuls of cookie dough onto  an ungreased cookie sheet.
  • Bake 10-12 minutes, checking after about 8 minutes for browned edges. I needed a full 12 minutes.


Here are some pics:


Mixing up the dough with my handy dandy mixing paddle.


All scooped and ready for baking.


After 12 minutes in the oven.


Now you can stop here or you can add to the amazingness 
by adding more chocolate.
I know, that is such a silly question,
OF COURSE 
I want to add in more chocolate, duh.

I had some milk chocolate cookie melts on hand.
You can use a chocolate bar as well.


I added about 1/2 cup into a mug and microwaved for 1 minute.
I stopped the microwave every 10 - 15 seconds to stir.


Again, yum.


Take a forkful of chocolate and drizzle it onto the cooled cookies.


These came out so great!

I made them for my grandfather's 85th birthday party and they were a hit.
The family gobbled them up.

Here is a pic of the cookie tray from my phone. 


And here is a picture of the birthday boy and all his great grandchildren.


Go out and make these soon! 


XOXO,
Photobucket

Featured on:


Linking up to these great parties:
Tuesday - Tip Junkie * Sugarbee Crafts * Funky Polkadot Giraffe * My Uncommon Slice of Suburbia * Crafty Confessions * Home Stories A to Z * Homework * Not Just a Housewife * Project Queen *A Diamond in the Stuff * Cherished Bliss * Blackberry Vine * Uncommon * The Southern Product Queen
Wednesday - Someday Crafts *Sew Much Ado * Tea Rose Home *A Little Tipsy * The Thrifty Home * Fireflies and Jellybeans * My Girlish Whims * Gingersnap Crafts *  Raegun Wear * The CSI Project* The Stuff of Success * Lil' Luna * The Sasse Life * Fine Craft Guild * Embracing Change * Go Team Duncan
Thursday - Somewhat Simple * The Shabbycreek Cottage * The 36th Avenue * Thrifty 101 * A Creative Princess * House of Hepworths * The Artsy Girl Connection * Katie's Nesting Spot * Between U and Me * A Glimpse Inside * Christina's Adventures * Made in a Day * Adventures in Dinner * 52 Mantels
Friday - Thirty Handmade Days * Romantic Home *Tatertots and Jello* Simply Designing * Creation Corner * Blissful and Domestic * Young and Crafty * Delicate Construction * Happy Hour Projects * Sassy Sites * A Blonde's DIY Life * Whipperberry * Little Inspiration * Serenity Now * Here Comes The Sun * Tidy Mom * Raising Oranges * Happy Go Lucky * The Grant Life * Toys in the Dryer * Fingerprints on the Fridge * Bacon Time * At the Picket Fence * Miss Mustard Seed
Saturday - Positively Splendid.com * Be Different Act Normal * Family Ever After *Lovely Crafty Home * Lollyjane * Funky Junk Interiors * Too Much Time On My Hands * Six Sisters Stuff * Country Momma Cooks * Nutmeg Place
Sunday - The Girl Creative *The DIY Showoff * Nifty Thrifty Things *Petite Hermine * I Heart Naptime * Flamingo Toes * Cherished Treasures *My 1929 Charmer * Embellishing Life Everyday * Sunday Social * Sassafras Salvation


Monday, January 2, 2012

Coconut Rum Cake


I remember making this recipe years ago and it being delicious.
I did have a small mishap, where the middle of the cake caved in a bit.
It was easily hidden by coconut.  :::insert whistle:::

At my cookie party (prior to the hospital drama), my cousin asked if I could make the
cake for the holidays.
I was finally able to make the cake for our New Years Day family get together.
(We had a blast playing Uno Attack!)

It was firm and delicious with the perfect amount of coconut, creamy icing and
definite taste of real rum.
The family raved about it and there was not a crumb left over.
(They all like their rum :)  )

After a quick internet search, I was able to find the original recipe from Epicurious.
I knew I wanted to make some recipe tweeks,
so I began reviewing all the lovely blogs that have also made the cake.
I really liked this version of the recipe, plus she has a great blog and yummy recipes.


Coconut Rum Cake Recipe


Yield: makes 12 servings
Baking Time: 40 min / Total Time: 2 hr

Ingredients:

For Cake:
•1 1/4 cups all-purpose flour
•1 1/2 teaspoons baking powder
•1/4 teaspoon salt
•4 large eggs plus 3 large yolks
•1 1/2 cups sugar
•1 teaspoon pure vanilla extract
•1 1/2 sticks unsalted butter, melted and cooled

•3/4 cup well-stirred sweetened cream of coconut such as Goya Cream of Coconut or Coco Lopez
•1 shot glass of Dark Rum, such as Captain Morgan (This will make your cake taste very strong.  Lessen the amount to your liking)
For icing:
•4 tablespoons cream cheese, softened
•3 tablespoons well-stirred sweetened cream of coconut
•2 tablespoon dark rum, such as Captain Morgan
•3/4 teaspoon pure vanilla extract
•2 - 3  tablespoons heavy cream
•1/2 cup confectioners’ sugar

Extras:
Shredded Sweetened Coconut to top the cake.

Equipment:
9-inch round cake pan (2 inches deep)


Cake Preparation:

1.  Preheat oven to 350 degreesF with rack in middle. Lightly butter cake pan then flour pan.

2.  Mix together flour (1 1/4 cups), baking powder, and salt.

3.  Beat together whole eggs and yolks, sugar, and vanilla in a large bowl. Gradually beat in flour mixture until combined, then beat in butter until just combined. Pour into cake pan and rap pan on counter to expel air bubbles.
4.  Bake until golden brown and cake starts to pull away from side of pan, about 40 minutes. Cool in pan on a rack 10 minutes.  Invert cake onto rack and cool 10 minutes more.

5.  Poke holes all over the cake with a fork.  Take you shot of rum and spoon it or brush it generously all over the cake until soaked in.

6.  Pour your cream of coconut onto the top of the cake and brush it around the top and sides until soaked in.

7.  Cool completely.


Make icing:

1.  Beat together cream cheese, cream of coconut, rum, vanilla, and 2 tablespoons cream with an electric mixer until smooth, then beat in confectioners’ sugar. Icing should be smooth and slightly runny; Add in more cream cheese to stiffen the icing or more heavy cream to loosen if necessary.

2.  Pour icing over top of cooled cake, allowing  to drip over side, then top with shredded coconut


Here are some pics of the cake in the works.

Look how nice this looks!
(I smoothed it out before baking)


If you have a Kitchen aid, I highly recommend the Scraper Beater Blade.
It is amazing and I love, love, love mine!! 
It leaves your batter nice and fluffly and it also leaves your bowl nice and scraped.
(not a paid endorsement, I really love it)


The original recipe calls for 45 minutes of baking, but this is mine after 40...


Once a bit cooled, poke holes into your cake using a fork and pour on the secret ingredients.
YUM!!


First your rum...


Then your cream of coconut...


All absorbed and ready for icing!


Topped with the icing and coconut. 
Just pour the icing in the middle and give the pan a little shimmy.
I left my icing on the thicker side, but you can make it more of a glaze if you want.


It was oh so delicioso!!!
And you shouldn't drive afterward. :)

I hope you enjoy it.


Photobucket


Featured on:


A Little Inspiration


Made in a Day


Adventuresindinner


Linking to:

Tip Junkie handmade projects

Home Stories A2Z


DIY under $5


The 36th Avenue